If you’ve ever wondered whether gluten-free baking could ever match the taste, texture, and joy of traditional baking, you’re not alone. Millions of people around the world are discovering that gluten-free baking isn’t just possible — it’s downright delightful. Whether you follow a gluten-free diet because of celiac disease, gluten sensitivity, a desire for better digestion, or simply because you love experimenting in the kitchen, this guide is for you.
Gluten-free baking has exploded in popularity over the last decade. Supermarket shelves now overflow with ready-made gluten-free mixes, and home bakers are creating everything from fluffy cakes to chewy cookies without a single grain of wheat. But success doesn’t happen by accident. It requires understanding a few key principles, choosing the right ingredients, and mastering a handful of techniques. In this comprehensive article, we’ll explore the fascinating history of gluten-free baking, share professional tips that will elevate your results, answer the most common questions people ask, and provide tested, crowd-pleasing recipes you can make today.
By the end, you’ll feel confident stepping into the kitchen armed with knowledge and inspiration. Gluten-free baking is no longer a compromise — it’s an opportunity to create baked goods that are every bit as satisfying, often more flavorful, and kinder to your body. Let’s dive in and turn your oven into a gluten-free haven.
A Brief History of Gluten-Free Baking
The story of gluten-free baking is deeply intertwined with the history of bread itself. Wheat has been cultivated for over 10,000 years, and gluten — the protein that gives dough its elasticity and structure — became the backbone of baking traditions across cultures. Ancient Egyptians, Greeks, and Romans all relied on wheat-based breads as dietary staples. For most of human history, gluten was simply part of everyday life, unnoticed and unproblematic for the vast majority of people.
The first recognition that gluten could cause health issues dates back to the first century AD, when Aretaeus of Cappadocia described a condition he called “coeliac affection,” characterized by chronic diarrhea and malnutrition. Yet it wasn’t until the 1940s that Dutch pediatrician Willem-Karel Dicke made a breakthrough. During World War II food shortages in the Netherlands, he observed that children with mysterious digestive problems improved dramatically when wheat was scarce. After the war, Dicke conducted experiments confirming that gluten was the culprit. His work laid the foundation for understanding celiac disease, an autoimmune disorder in which gluten triggers the immune system to attack the small intestine.
For decades afterward, gluten-free baking remained a niche medical necessity rather than a culinary trend. Patients followed strict diets using rudimentary substitutes like potato starch, rice flour, and cornstarch. These early attempts produced dense, crumbly, and often tasteless results that felt more like punishment than pleasure. Home bakers had to experiment endlessly, and commercial options were virtually nonexistent.
The turning point came in the early 2000s. Improved diagnostic tools revealed that celiac disease affected far more people than previously thought — approximately 1 in 100 individuals worldwide. At the same time, a growing number of people without celiac disease began reporting improved energy, reduced bloating, and clearer skin after eliminating gluten. The “gluten-free” label transitioned from a medical prescription to a mainstream lifestyle choice.
By 2010, the gluten-free market was booming. Food manufacturers invested heavily in research and development, creating all-purpose gluten-free flour blends that mimicked the behavior of wheat flour. Innovative ingredients like xanthan gum, psyllium husk, and tapioca starch revolutionized texture. Social media platforms such as Pinterest and Instagram allowed passionate home bakers to share successes and failures, creating a global community of gluten-free enthusiasts.
Today, gluten-free baking stands at the forefront of inclusive cuisine. Professional bakeries offer dedicated gluten-free lines, and celebrity chefs publish best-selling cookbooks dedicated to the topic. Modern gluten-free recipes deliver moist cakes, crusty breads, and tender pastries that rival — and sometimes surpass — their gluten-containing counterparts. The journey from a medical restriction to a celebrated culinary art form proves one thing: necessity truly is the mother of invention. What began as survival has become a creative playground for millions of bakers worldwide.
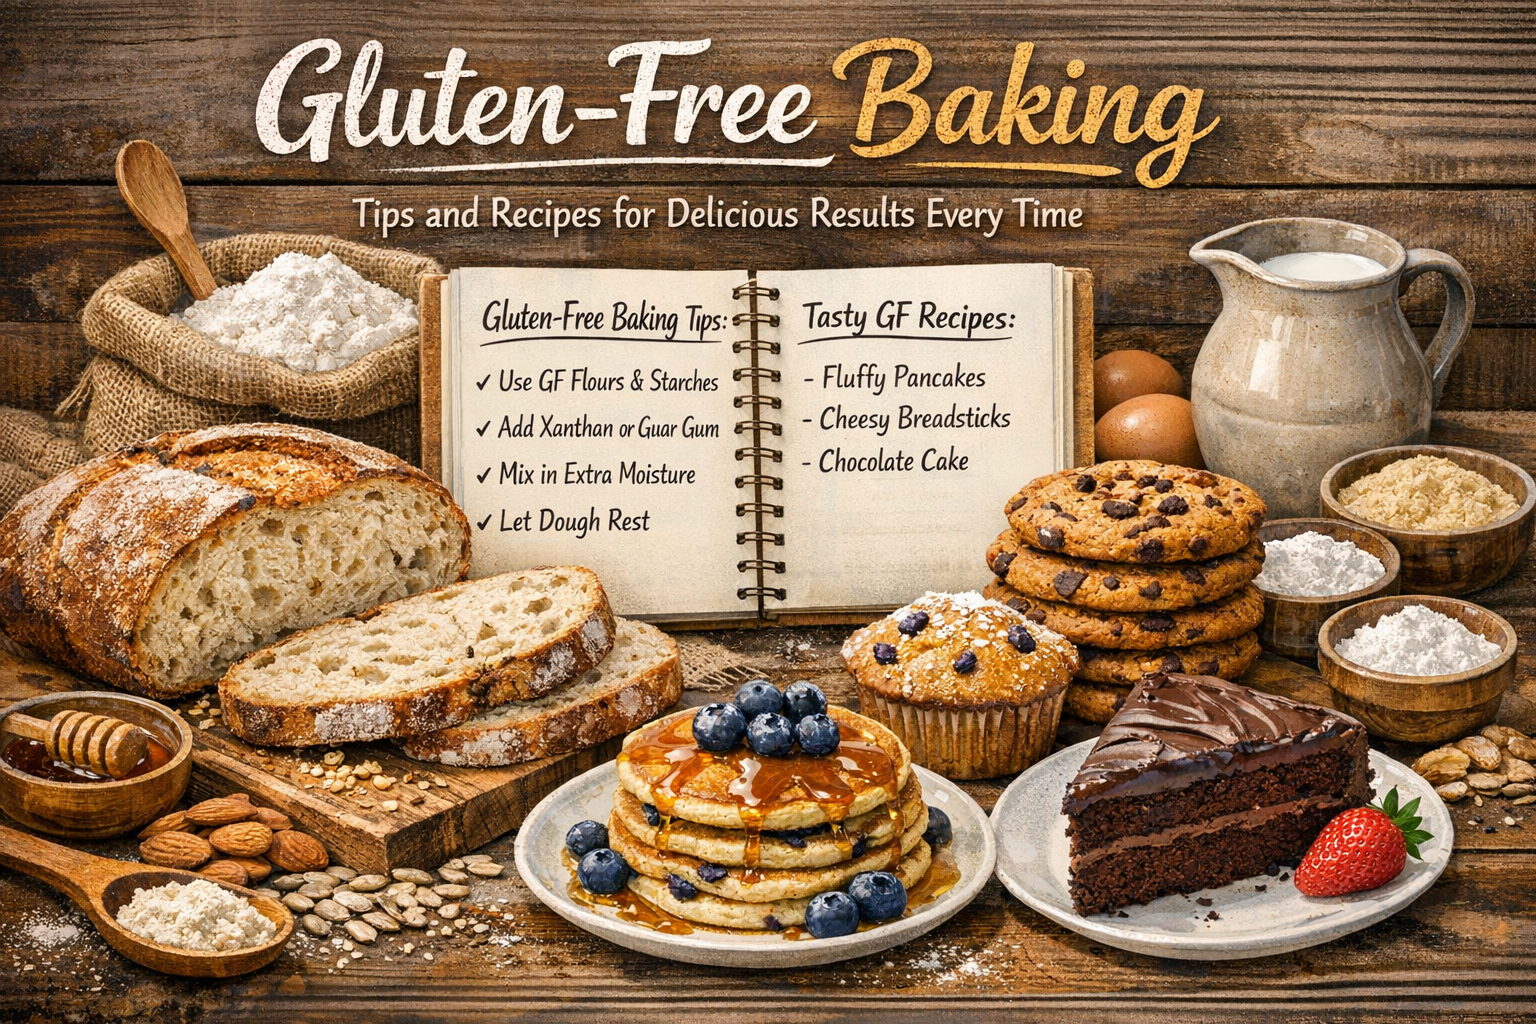
Essential Tips and Suggestions for Successful Gluten-Free Baking
Mastering gluten-free baking requires shifting your mindset from traditional techniques to a new set of rules. Gluten provides structure, elasticity, and chew. Without it, you must recreate those qualities using clever ingredient combinations and precise methods. Here are the most important tips and suggestions, drawn from years of trial and error in gluten-free kitchens.
1. Choose the Right Gluten-Free Flours and Blends
Never rely on a single flour. Single-ingredient flours like rice flour alone can taste gritty or produce dry results. The secret is using a blend. Commercial all-purpose gluten-free flour blends (such as Bob’s Red Mill 1-to-1 or King Arthur Measure for Measure) are formulated to replace wheat flour directly in most recipes. For custom blends, combine:
- Brown rice flour or sorghum flour for structure and mild flavor
- Almond flour or coconut flour for moisture and richness (use sparingly — coconut flour is highly absorbent)
- Tapioca starch or potato starch for chew and lightness
- Buckwheat or millet flour for earthy, nutty notes
A reliable homemade blend ratio is 40% whole-grain flour, 40% starch, and 20% protein-rich flour (like almond). Weigh ingredients instead of using volume measurements — gluten-free baking is far less forgiving of inaccuracies.
2. Master the Art of Binders
Without gluten, doughs and batters need help holding together. Xanthan gum is the most popular binder, used at ¼ to ½ teaspoon per cup of flour. Too much creates a gummy texture; too little leads to crumbling. Psyllium husk powder offers a more natural alternative and adds fiber. For egg-free baking, flaxseed or chia seed gels work beautifully as binders.
3. Increase Moisture and Fat
Gluten-free flours absorb more liquid than wheat flour. Most recipes require an extra 2–4 tablespoons of liquid per cup of flour. Add an extra egg or egg yolk for richness. Healthy fats like coconut oil, avocado oil, Greek yogurt, or applesauce keep baked goods tender longer. Never skimp on fat — it’s the secret to that melt-in-your-mouth texture.
4. Adjust Leavening Agents
Gluten-free batters are heavier, so increase baking powder or baking soda by 25–50%. Adding a touch of apple cider vinegar or lemon juice activates baking soda and improves rise. Let batters rest 15–30 minutes before baking so starches can hydrate fully.
5. Control Oven Temperature and Timing
Gluten-free baked goods often brown faster on the outside while remaining undercooked inside. Reduce oven temperature by 25°F (about 15°C) and extend baking time slightly. Use an oven thermometer for accuracy. Toothpick tests can be misleading; look for golden edges and a firm center that springs back when gently pressed.
6. Prevent Cross-Contamination
Even tiny amounts of gluten can ruin a recipe for sensitive individuals. Use dedicated gluten-free utensils, separate toasters, and clean surfaces thoroughly. Buy certified gluten-free ingredients whenever possible.
7. Storage and Freshness Secrets
Gluten-free baked goods stale faster than wheat versions. Store in airtight containers at room temperature for up to two days. Freeze individual portions wrapped tightly in plastic and foil. Refresh frozen items in a 300°F oven for 8–10 minutes to restore freshness.
8. Flavor Boosters That Make a Difference
Gluten-free flours can taste bland. Enhance flavor with vanilla extract, citrus zest, spices, cocoa powder, or a pinch of salt. Browning butter before using it adds nutty depth that masks any “floury” aftertaste.
9. Equipment That Makes Life Easier
Invest in a good digital scale, silicone baking mats, and a stand mixer. A kitchen scale is non-negotiable for consistent results. Silicone mats prevent sticking without extra grease.
10. Troubleshooting Common Problems
- Dense texture? More leavening or longer resting time.
- Crumbly results? Extra binder or fat.
- Gummy center? Reduce xanthan gum or bake longer at lower temperature.
- Bland taste? Add more salt and flavor extracts.
Following these tips transforms gluten-free baking from frustrating to foolproof. Practice is key — each recipe you try builds muscle memory and intuition.
Mouthwatering Gluten-Free Recipes You’ll Make Again and Again
Now let’s put those tips into practice with five crowd-pleasing recipes. Each one has been developed and refined to deliver professional results at home.
Gluten-Free Chocolate Chip Cookies (Makes 24 cookies)
These cookies are crisp on the edges and chewy in the center — exactly what cookie lovers crave.
Ingredients:
- 2¼ cups (280g) gluten-free all-purpose flour blend
- 1 tsp xanthan gum (omit if your blend already contains it)
- 1 tsp baking soda
- ½ tsp salt
- ¾ cup (170g) unsalted butter, softened
- ¾ cup (150g) granulated sugar
- ¾ cup (165g) packed brown sugar
- 2 large eggs + 1 egg yolk
- 2 tsp pure vanilla extract
- 2 cups (340g) semi-sweet chocolate chips
- Optional: ¾ cup chopped walnuts
Instructions:
- Preheat oven to 350°F (175°C). Line two baking sheets with parchment.
- Whisk together flour, xanthan gum, baking soda, and salt.
- Cream butter and both sugars until light and fluffy, about 3 minutes.
- Add eggs, yolk, and vanilla; beat until combined.
- Gradually add dry ingredients. Stir in chocolate chips (and nuts if using).
- Chill dough 30 minutes.
- Scoop 2-tablespoon portions, place 2 inches apart.
- Bake 11–13 minutes until edges are golden. Centers will look slightly underdone — they firm up as they cool.
- Cool on sheet 5 minutes, then transfer to wire rack.
Pro tip: For extra-large bakery-style cookies, scoop ¼-cup portions and bake 14–16 minutes.
Gluten-Free Banana Bread (1 loaf)
Moist, fragrant, and perfect for breakfast or afternoon tea.
Ingredients:
- 1½ cups (190g) gluten-free all-purpose flour blend
- 1 tsp xanthan gum
- 1 tsp baking soda
- ½ tsp salt
- ½ cup (115g) unsalted butter, melted
- ¾ cup (150g) granulated sugar
- 2 large eggs
- 1½ cups (about 3 large) very ripe mashed bananas
- ⅓ cup plain Greek yogurt or sour cream
- 1 tsp vanilla extract
- ½ cup chopped pecans or chocolate chips (optional)
Instructions:
- Preheat oven to 325°F (165°C). Grease 9×5-inch loaf pan and line with parchment.
- Whisk dry ingredients.
- Mix melted butter, sugar, eggs, bananas, yogurt, and vanilla until smooth.
- Fold wet into dry until just combined. Add mix-ins.
- Pour into pan and bake 55–65 minutes until toothpick comes out clean.
- Cool in pan 15 minutes, then remove and cool completely.
This bread stays fresh for days when wrapped tightly.
Gluten-Free Classic Pizza Crust (Two 12-inch pizzas)
Crispy, chewy, and holds toppings beautifully.
Ingredients:
- 2½ cups (315g) gluten-free all-purpose flour blend
- 1 tsp xanthan gum
- 2 tsp instant yeast
- 1 tsp salt
- 1 tsp sugar
- 1 cup warm water (105–110°F)
- 2 Tbsp olive oil
- 1 tsp apple cider vinegar
Instructions:
- Combine yeast, sugar, and warm water. Let bloom 5 minutes.
- Mix flour, xanthan gum, and salt.
- Add yeast mixture, oil, and vinegar. Knead 5 minutes until smooth (dough will be soft).
- Cover and let rise 45–60 minutes.
- Preheat oven to 425°F (220°C) with pizza stone or steel inside if possible.
- Divide dough, press into 12-inch circles on parchment.
- Pre-bake crusts 8 minutes.
- Add sauce and toppings, bake additional 10–12 minutes until cheese is bubbly.
Gluten-Free Vanilla Layer Cake (Two 8-inch layers)
Tender, fluffy, and perfect for birthdays.
Ingredients:
- 2½ cups (315g) gluten-free all-purpose flour blend
- 1 tsp xanthan gum
- 2½ tsp baking powder
- ½ tsp salt
- 1 cup (225g) unsalted butter, softened
- 1¾ cups (350g) granulated sugar
- 4 large eggs
- 1 Tbsp vanilla bean paste or extract
- 1 cup whole milk + 1 Tbsp lemon juice (let sit 5 minutes)
Instructions:
- Preheat oven to 325°F (165°C). Grease and line two 8-inch pans.
- Whisk dry ingredients.
- Cream butter and sugar 4 minutes until very fluffy.
- Add eggs one at a time, then vanilla.
- Alternate adding dry ingredients and milk mixture, beginning and ending with dry.
- Divide batter evenly. Bake 28–34 minutes.
- Cool completely before frosting with your favorite buttercream.
Gluten-Free Blueberry Muffins (12 muffins)
Bursting with juicy berries and a tender crumb.
Ingredients:
- 2 cups (250g) gluten-free all-purpose flour blend
- 1 tsp xanthan gum
- 2 tsp baking powder
- ½ tsp salt
- ½ cup (115g) unsalted butter, melted
- ¾ cup (150g) sugar
- 2 large eggs
- ½ cup milk
- 1 tsp vanilla
- 1½ cups fresh or frozen blueberries
- 2 Tbsp coarse sugar for topping
Instructions:
- Preheat oven to 375°F (190°C). Line muffin tin.
- Toss blueberries with 1 Tbsp flour (prevents sinking).
- Mix remaining dry ingredients.
- Whisk butter, sugar, eggs, milk, and vanilla.
- Combine wet and dry until just mixed. Fold in blueberries.
- Fill cups ¾ full, sprinkle with coarse sugar.
- Bake 20–24 minutes until golden.
Each of these recipes proves that gluten-free baking can deliver bakery-quality results at home.
Common Questions About Gluten-Free Baking Answered
Is gluten-free baking more expensive?
Yes, specialty flours and binders cost more than regular wheat flour. However, buying in bulk, making your own blends, and focusing on naturally gluten-free ingredients (almond flour, oats, etc.) can keep costs manageable.
Does gluten-free baked goods taste the same?
With the right recipes and techniques, they often taste even better. Modern blends eliminate the gritty texture many remember from early gluten-free products. The variety of flours actually allows for more complex flavors.
Can I simply substitute gluten-free flour in my favorite wheat recipes?
Sometimes, but not always. Recipes that rely heavily on gluten (yeasted breads, pie crusts) need additional adjustments. Start with recipes developed specifically for gluten-free baking for best results.
Is gluten-free baking healthier?
Not automatically. Many commercial gluten-free products contain more sugar and fat to compensate for texture. However, when you bake from scratch using whole-food ingredients, gluten-free versions can be nutrient-dense and easier to digest for sensitive individuals.
How do I prevent my gluten-free bread from being dense?
Use a combination of starches and whole-grain flours, increase yeast or baking powder, let the dough rise properly, and add extra hydration. A stand mixer helps develop structure.
What’s the best way to store gluten-free baked goods?
Room temperature in airtight containers for 1–2 days. Freeze for longer storage. Refresh in a warm oven before serving.
Can I make gluten-free baking vegan?
Absolutely. Use flax eggs, plant-based milk, and vegan butter. Many of the recipes above adapt easily.
Why does my gluten-free cake sink in the middle?
Usually under-baking or opening the oven door too early. Gluten-free batters are more delicate. Test doneness with a toothpick and avoid peeking during the first ¾ of baking time.
Are oats safe for gluten-free diets?
Only certified gluten-free oats. Regular oats are often cross-contaminated during processing.
How long does it take to learn gluten-free baking?
Most people see dramatic improvement after baking just 4–5 recipes. Keep notes on what works and what doesn’t.
These answers address the doubts that hold many people back. With patience and practice, those doubts disappear.
Conclusion
Gluten-free baking has come a long way from its humble medical beginnings to become a vibrant, creative, and delicious part of modern cooking. We’ve explored its rich history, uncovered the essential tips that make every bake a success, shared five versatile and tested recipes, and answered the questions that matter most to home bakers.
The key takeaways are clear: choose quality flour blends, embrace binders and extra moisture, weigh your ingredients, adjust leavening, and experiment with confidence. Whether you’re baking chocolate chip cookies for the kids, a birthday cake for a loved one, or a Saturday-morning pizza, gluten-free baking delivers joy without compromise.
Now it’s your turn. Pick one recipe from this article, gather your ingredients, and give it a try this weekend. You’ll be amazed at how satisfying the results can be. Once you’ve baked, come back and leave a sincere comment below. Share which recipe you tried, what you loved, any tweaks you made, or suggestions for future articles. Your feedback helps this community of gluten-free bakers grow stronger together.
Happy baking — may your kitchen always smell like fresh gluten-free goodness!